How to Insulate and Seal Attic Stairs and Hatches
To insulate and seal attic stairs or a hatch, do four things in order: weatherstrip the opening, add a latch that pulls the door tight, fasten rigid foam board to the attic side of the door, and build a rigid dam around the opening that stands at least 2 inches above the attic insulation. Pull-down stairs also need an insulated cover over the opening, such as a foam box, a tent or a zip cover. Skip any one of these and the attic access stays a hole in your attic insulation, however deep the rest of it is.
This guide walks through the whole job: why the access leaks so much, the kinds of access, each step with the materials it takes, how to choose a stair cover, the mistakes that waste the effort and when to hand it to someone else. Sealing the access is part of air sealing, and it is often the first gap we close in an attic.
Why the Attic Access Is One of the Biggest Air Leaks in the House
The attic access is a hole cut through the ceiling, and in many homes nothing stops air or heat at that hole. A U.S. Department of Energy fact sheet on attic access calls an uninsulated hatch, stair or knee-wall door one of the biggest weak spots between the attic and the living space. It also gives a number worth remembering: a gap of just a quarter inch around the edge of an attic access can leak about as much air as a typical bedroom heating duct supplies, roughly 100 cubic feet a minute.
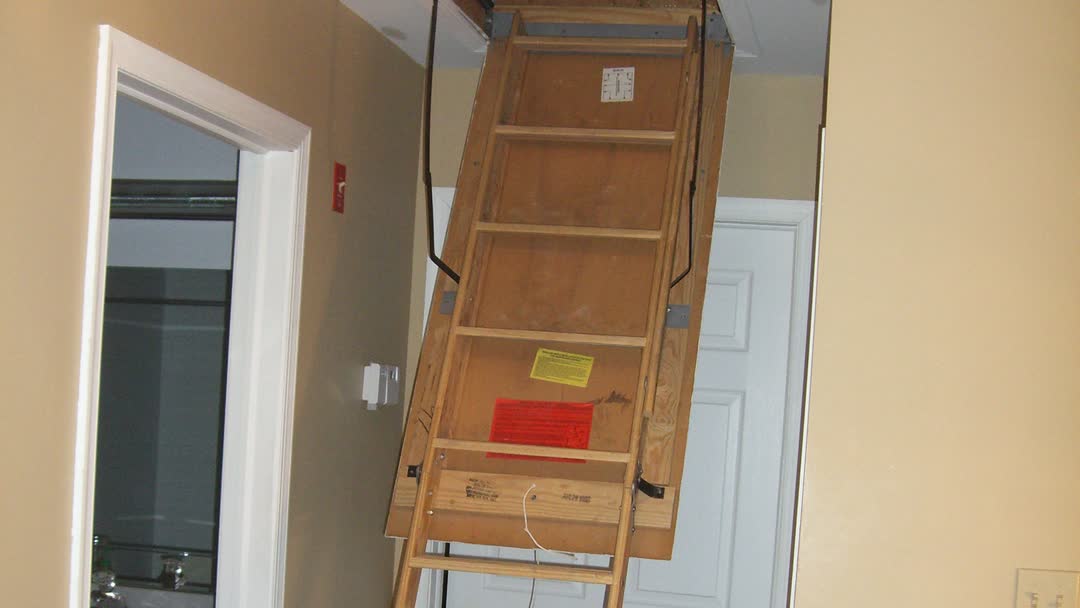
Look at a typical pull-down stair and the reason is plain. The panel is a thin sheet of wood resting in a frame, with gaps along its edges and another gap between the frame and the ceiling framing, hidden behind the trim. A scuttle hatch is often a loose square of drywall or plywood lying on the trim. Neither one was built to seal.
ENERGY STAR's advice for this spot is short: treat the attic door like a door to the outside. You would not leave a front door without weatherstripping, a latch and some insulation, and the attic access needs the same three things.
Why it matters in a North Carolina summer and winter
In winter, warm indoor air rises and pushes out through openings high in the house, which builders call the stack effect. An unsealed hatch is exactly that kind of opening. In summer the attic above your hallway is the hottest space in the house: ENERGY STAR tells people working in attics to start early on hot days, because attics heat up as the day goes on.
North Carolina's energy code for new homes takes the access seriously. The 2018 North Carolina Energy Conservation Code, still the edition in force, asks for weatherstripping and at least R-10 on a horizontal hatch, and at least R-5 on pull-down stairs and vertical access doors. It also calls for a wood-framed or equivalent baffle around the opening wherever loose-fill insulation is installed. Many older homes were built before those rules, and many newer ones have lost the weatherstrip or the cover since.
Scuttle Hatch, Pull-Down Stairs or Knee-Wall Door: Which One You Have
The steps are the same for every kind of access, but the details differ, so start by naming yours. The Department of Energy fact sheet describes these:
- Scuttle hatch. A removable panel in the ceiling, commonly in a closet or a main hallway. The lid rests on trim or on stops around the opening and lifts up into the attic.
- Pull-down stairs. A folding ladder fixed to a hinged panel. The frame sits in a rough opening and leaves a gap, much like a door or window frame, and that gap has to be sealed.
- Knee-wall door. A small vertical door in the short wall of an upstairs room under the roof, common in bonus rooms and story-and-a-half homes. The fact sheet calls knee walls notoriously leaky and often poorly insulated.
- Full-height attic door. A regular interior door that opens onto a walk-up attic stair. It should be insulated, weatherstripped and fitted with a tight threshold.
Where is the best place for an attic access?
If you are adding one, the same fact sheet suggests an unconditioned, secure part of the house, such as a garage. An access from a garage into a vented attic, where the garage ceiling is uninsulated, may need no sealing or insulation at all. Moving an existing access is rarely worth the trouble.
Rather Talk It Through Than Read?
Call (336) 870-3893Monday to Friday 8:00 am to 5:00 pm. Saturday by appointment. Sunday closed.
Step 1: Weatherstrip the Opening and Add a Latch
Stop the air first. The Department of Energy job aid for installers lists closed-cell foam tape or weatherstripping where the door meets its frame, plus latches as needed so the door closes tight against that weatherstripping. The Department's Building America guidance says the same for access panels, knee-wall doors and drop-down stairs: add weatherstripping or a gasket, and install latch bolts or mechanical fasteners that pull the door tight. Weatherstripping that the door only rests on, without pressure, does little.
For a scuttle hatch, ENERGY STAR's steps are these:
- Clean the trim or stops so the adhesive will hold.
- If the hatch rests directly on the moldings, add 2-1/2 inch wide stops around the opening. They give the weatherstrip a wider surface and leave room for fasteners.
- Apply self-sticking weatherstrip to the stops, all the way around.
- Fit hook-and-eye fasteners, with the screw eyes placed so the weatherstrip is slightly compressed when the hooks are latched.
- Caulk the joint between the trim and the ceiling, so air cannot go around the weatherstrip.
How do you seal around pull-down attic stairs?
Pull-down stairs leak in two places: around the panel, and between the stair frame and the rough opening, behind the ceiling trim. Take the trim off to reach the second gap. The Department of Energy fact sheet says caulk is enough where that gap is under half an inch. For a wider gap, use a foam backer rod with caulk, or a non-expanding foam sealant, because expanding foam can warp the frame.
Then add weatherstripping or a gasket where the panel meets the frame, on either the frame or the panel, and a latch bolt or hook-and-eye that pulls the panel up into it. Check the fit with the stairs folded, since a panel that sits unevenly leaks at one corner.
What weatherstripping should you use on an attic door?
Self-adhesive closed-cell foam tape or a rubber gasket suits most hatches and stair panels. Pick a thickness that compresses when the door is latched but still lets it close fully, and replace it once the door no longer presses into it. A knee-wall or full-height door takes ordinary exterior-door weatherstripping and a sweep at the bottom.
Step 2: Insulate the Hatch Lid or Door to Match the Attic
With the air stopped, add insulation to the attic side of the door. ENERGY STAR says to cut fiberglass or rigid foam board to the size of the hatch and nail or glue it to the back. The Department of Energy fact sheet recommends rigid board: cut it a quarter inch smaller than the hatch so it clears the opening, build up 3 or 4 inches with construction adhesive and screws, and, if you like, glue the paper side of a batt to the top layer. The installer job aid adds two rules: attach the insulation durably, and go as high in R-value as the structure allows, up to the level of the attic around it.
How much is enough? The North Carolina code minimum for a new home is R-10 on a hatch, and the attic floor around it should be far higher. On the 2021 climate map that ENERGY STAR's chart uses, climate zone 3 covers most of the state, and the chart lists R-49 there for an uninsulated attic and R-38 where 3 to 4 inches are already in place. In zones 4 and 5, mostly the mountains, it lists R-60 and R-49. A lid rarely gets close, because of weight and clearance, so aim for as much as the hatch can carry and still close.
Foam board is labeled with its R-value. A Department of Energy guide to home insulation lists one inch of expanded polystyrene at about R-3.8 to R-4.4, extruded polystyrene at R-5 and polyisocyanurate at R-6.5. So R-10 takes roughly two inches of extruded or polyiso board, or close to three of expanded polystyrene.
Is foam board safe to leave exposed in an attic?
Not always. The Department of Energy job aid tells installers to use materials that meet the applicable fire safety code, such as thermal or ignition barriers, and North Carolina's code says exposed foam plastic must meet the building code's provisions. In practice, read the product label for where it may be left exposed, choose a faced board where the label calls for it, and ask your local building inspections office if you are unsure.
How do you insulate a pull-down attic stair panel?
Carefully, because the folded ladder rests on the panel. North Carolina's code for new homes asks for at least R-5 on a pull-down stair, installed so it does not interfere with the stairs, and it does not allow soft, non-rigid insulation on the stair itself. It does allow an insulated cover that encloses the stair from above. So the panel gets thin rigid board where it fits, and the real insulation goes into the cover described below. Follow the stair maker's instructions before adding weight to the panel.
Knee-wall doors and walk-up attic doors
The fact sheet treats a knee-wall door the same way: weatherstrip it, fit a latch that pulls it tight, and glue and screw layers of rigid board to its attic side, leaving clearance at the frame. North Carolina's code asks R-5 of vertical access doors in new homes. Look at the knee wall itself while you are there, since it is usually as leaky as the door.
Step 3: Build a Dam So Attic Insulation Stays Put
A dam is a rigid frame around the opening on the attic side. It keeps loose-fill insulation from spilling into the house every time you open the access, and it keeps the insulation at full depth right up to the edge of the hole. The Department of Energy job aid calls for a rigid, durable dam installed permanently, and for it to remain 2 inches taller than the final insulation depth. North Carolina's code for new homes says the same in its own words: a wood-framed or equivalent baffle or retainer wherever loose-fill is installed, so the insulation cannot spill into the living space and keeps its installed R-value.
A simple dam is built like this:
- Find the final depth. The coverage chart on the insulation bag lists the thickness for each R-value. Add at least 2 inches.
- Cut lumber or plywood strips to that height and fasten them on edge to the joists or framing around the opening, forming a box.
- Leave enough room inside for the lid to lift and for the stairs to unfold without hitting the dam.
- Seal the gaps between the stair frame and the rough opening first, while they can still be reached.
- Fill the attic floor outside the dam to its full depth, right against the dam on every side.
When should the dam go in?
Before any new insulation is blown, so the easiest time is during an attic insulation job. A bare dam with nothing over it still leaves a hole in the insulation, which is why pull-down stairs get a cover on top. If you plan to blow the attic yourself, our guide to DIY blown-in attic insulation covers the machine, the bags and the depth markers.
Attic Stair Covers: Box, Tent or Zip Cover
Because a pull-down stair panel cannot hold much insulation, the opening gets a cover instead. ENERGY STAR notes that pre-made insulated attic stair covers are sold at home improvement centers and online. The Department of Energy fact sheet describes a lightweight, movable box built from rigid foam or fibrous duct board that fits over the stairs from the attic side, and says insulating kits are also sold by weatherization suppliers and hardware stores. The three common types compare like this:
| Cover type | How it works | What to check |
|---|---|---|
| Foam box | Sits over the opening on the attic side and lifts off from the ladder | Fits over the folded stairs and seals on the dam or frame |
| Tent cover | A light insulated tent laid over the opening from above | The R-value printed on the package, and a snug fit all round |
| Zip cover | A panel fixed to the ceiling below, opened with a zipper | Mainly stops air; check its R-value and the zipper |
How to build an attic stair cover box
The Department of Energy fact sheet cuts a box from one 4 by 8 foot sheet of rigid insulation: two sides, two ends, a top and a center brace, about 9 inches high inside, glued with adhesive or duct mastic and pinned with roofing nails. Measure your own stairs inside and out, and make the box tall enough to clear the folded ladder. It should rest squarely on the stair frame or the dam, with any gap shimmed and sealed and weatherstripping where it sits.
Which attic stair cover fits your house?
Think about how often you go up. If the air handler for your heating and cooling sits in the attic, a technician has to get through the opening, so the cover must lift off easily and never be screwed down. A light box with a handle, or a tent, suits stairs that get used often. A heavier foam box gives the most insulation. A zip cover goes on from the room side, which helps where there is little clearance above, but alone it is mostly an air seal.
Attic Hatch and Stair Mistakes That Cost Money
Most failed attic access jobs come down to one missing step. These are the ones to avoid:
- Insulating without sealing. Foam on a lid that rattles in its frame still lets air through the gaps. Weatherstrip and latch first.
- Skipping the gap behind the trim. The space between a stair frame and the rough opening is often the bigger leak, and it stays hidden until the trim comes off.
- Filling a stair frame gap with expanding foam. The Department of Energy warns it can warp the frame so the stairs stop opening or closing properly.
- A loose batt laid on the lid. It slides off the first time the hatch is pushed up. The installer job aid asks for insulation that is durably attached.
- A dam that is too short or too soft. Loose-fill creeps over it, falls through the opening and leaves a thin ring around the hole. The dam stays 2 inches above the final depth.
- A cover that is a chore to move. If it is heavy or awkward, it ends up left to one side, and an open cover does nothing. It only works when it goes back after every trip.
When to Call a Pro for the Attic Access
Weatherstripping a hatch, adding hook-and-eye latches and gluing foam to a lid are fair weekend projects. ENERGY STAR's tips for attic work still apply: gather your tools first, work early on hot days, drink water, wear a particulate respirator or dust mask, and walk only on the joists or truss chords, never on the drywall between them.
Hand it off when it is part of a bigger job. If the attic is getting new insulation, the dam and the sealing belong at the start of that work, and if the old layer is damp, dirty or too thin to keep, we vacuum out the old insulation first and seal the bare attic floor. If you also want storage up there, our guide to attic flooring and storage over insulation shows how to raise a platform above the full depth. ENERGY STAR also recommends a professional when the attic is hard to get into or work in, when insulation is wet, and when gas or oil appliances need a draft test before and after sealing. Insulation that looks like small pebbles may be vermiculite, and the EPA's advice is to leave it undisturbed until it has been checked.
Stairs that are cracked, loose or cut to the wrong length need a carpenter or a new stair first, because a twisted panel will not seal. To measure how tight the finished access is, the installer job aid checks it with a blower door and smoke. Our home energy audit is a paid service, so ask when you book whether a blower door test is included.
What a contractor should put in writing for the access
Ask for each part by name: weatherstripping, a latch, insulation on the door or a stair cover with its R-value, the dam and its height, and sealing behind the trim. When one quote is much lower than another, the hatch work is often what was left out. The order is the same one explained in why air sealing comes before insulation: seal the opening, then insulate around it.
Get a Free Estimate
Feel a draft around the pull-down stairs? Tell us the attic's square footage and what kind of access you have, and we'll price the sealing, the dam and the insulation together. Most attics don't need a visit to price.

Prefer to talk? Call (336) 870-3893.